Pages

Showing posts with label windows registry. Show all posts

Wednesday, November 9, 2011

How To Disable The Caps Lock Key Permanently

When I was working in IT I sometimes dealt with support requests that involved the caps lock key. Users were complaining that they could not enter their password, or that they locked their account even though they were sure that they had entered the right password, or that their username was displayed in upper case letters.

The caps lock key, next to num lock, was the culprit here most of the time. Most computer users do not need the caps lock key on the keyboard anymore. The following guide explains how you can disable the caps lock key permanently.
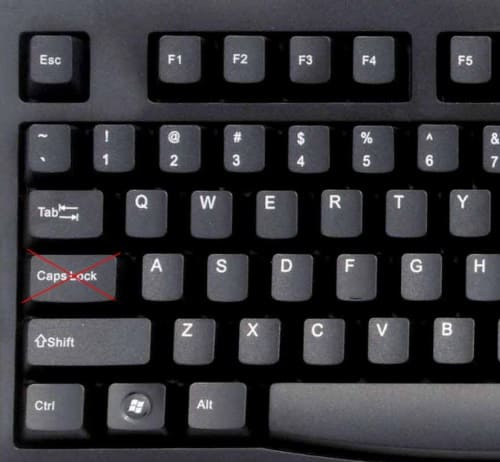
caps lock

Here is how it is done. Open the Windows Registry the following way: Hold down Windows-r to bring up the run box, enter regedit into the box and tap on the enter key. This opens the Windows Registry Editor. Navigate to the following Registry key in the folder browser on the left.

HKEY_LOCAL_MACHINE\SYSTEM\CurrentControlSet\Control\Keyboard Layout

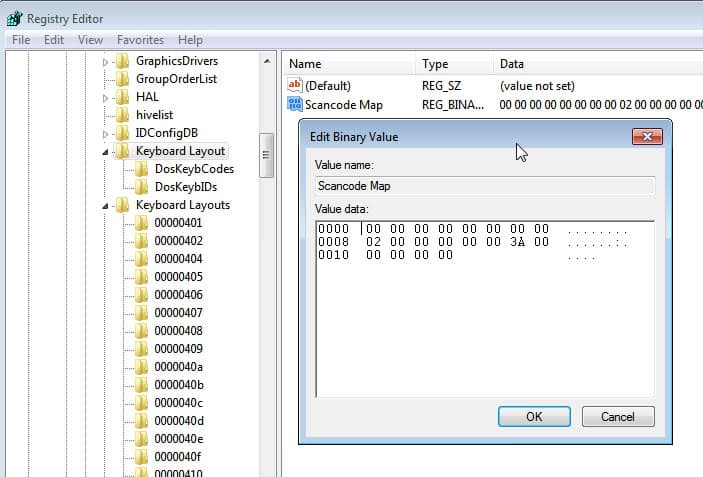
Right-click on Keyboard Layout and select New > Binary from the context menu. Enter Scancode Map and press enter to add the key. Double-click on the newly created key afterwards and enter the following information.

00 00 00 00 00 00 00 00
02 00 00 00 00 00 3A 00
00 00 00 00

Take a look at the following screenshot to see how it should look like in the Registry editor.
disable caps lock key

You need to restart your PC after you have made the changes. Once you have done that you will notice that the caps lock key will no longer function under Windows. Nothing happens if you tap on the key.

Please note that some applications may make use of the caps lock key. If that is the case you may break some or all of their functionality. You can re-enable the caps lock by deleting the Scancode Map Registry key and restarting the Windows PC.

Keyboard remapping software like Sharp Keys can also be used to remap the caps lock key so that it no longer functions at all or offers a different function.

Are you using Caps Lock? If so, for what?


© Martin Brinkmann for gHacks Technology News | Latest Tech News, Software And Tutorials, 2011. | Permalink |
Add to del.icio.us, digg, facebook, reddit, twitter
Post tags: , , , ,


Tuesday, October 25, 2011

Remove Applications from the Context Menu in Windows Manually

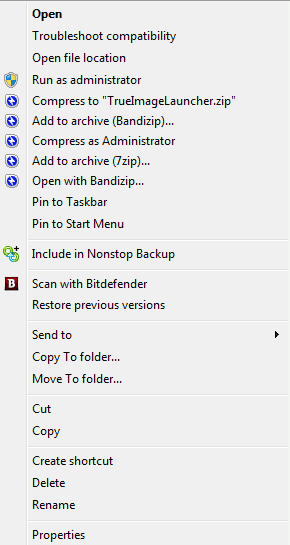
Windows accumulates context menu items any time you install several applications. Not all applications end up on the context menu but enough do so over time that the menu can become cluttered. You might find yourself wondering, “How did that get there?” You may not want it on the context menu, but it is there and you are stuck with it. Or are you? No, you are not. If it is something that you use, perhaps you should leave it on the context menu. If you do not use the application very often and prefer to access it from a different location, there is no reason to leave it there. After awhile, the context menu can become a complete mess. Using the registry hack methods in this tutorial will allow you to clean up the context menu so it does not have to look as extensive as this example:

windows explorer context menu

The items on the context menu are all in the registry and a simple registry hack can easily remove them. Note that this is for the more experienced user and there are registry management utilities available for those who are inexperienced with accessing the Windows registry directly. Also, before digging into the registry and making any changes; create a restore point so that if you cause any undue problems you will be able to reverse the changes.
To clean up the context menu by hacking the registry, open regedit.exe from the Start menu. The unfortunate part of this is that context menu items are not stored in one location in the registry. You can find most of the menu items for various files and folders by searching one of the following registry keys:

  • HKEY_CLASSES_ROOT\*\shell
  • HKEY_CLASSES_ROOT\*\shellex\ContextMenuHandlers
  • HKEY_CLASSES_ROOT\AllFileSystemObjects\ShellEx

If the menu items are associated with specific folders, they can be found in one of the following two registry keys:

  • HKEY_CLASSES_ROOT\Directory\shell
  • HKEY_CLASSES_ROOT\Directory\Shellex\ContextMenuHandlers

Items in the context menu will need to be changed differently depending on the location in the registry. Shell items are the easiest to find. For example, browse to the shell key under Directory.

To hide an item, use Shift+Right-Click and add a new string value in the right pane. Name the new string “Extended”.

This will hide the item from the context menu. You can also enter “LegacyDisable” for the new string value and this will disable the key. If you choose to delete the key entirely, export and save a copy first.

When dealing with “shellex” items, you will go to one of the keys listed above:

  • HKEY_CLASSES_ROOT\Directory\shellex\ContextMenuHandlers

Determine the correct item by the key name in the left pane. Disable it by inserting a few dashes before the value item. This will not delete the item. In this example, SUPERAntiSpyware is disabled from the context menu in this manner.

context menu

Each key location indicated above will need to be searched to find the items you wish to remove (disable) from the context menu. For specific file types, use the Extended or LegacyDisable string values to disable. You will only need to edit the string with dashes for shellex items. This may seem tedious to some users while others may prefer these methods.

You can actually learn a lot by perusing the registry but it should always be done with great care. If you are inexperienced with this, create a full backup of the registry before playing around and, as mentioned, create a restore point


© Melanie Gross for gHacks Technology News | Latest Tech News, Software And Tutorials, 2011. | Permalink |
Add to del.icio.us, digg, facebook, reddit, twitter
Post tags: , , ,